26-05-2011, 09:00 PM
My younger son (43 - I know I'm getting old, when my kids are getting old) fancied a green 'Toaster' radio on our recent NVCF visit until he enquired as to the price - £295!! Do what? I said we'd look out for a shabby cream one restore it and re-spray it green. I saw two on one stand, one for £30 another for £35, which I though was cheap for 'Toasters' but they hadn't sold by lunchtime, which surprised me. Then I saw one in a bit of a sorry state, with its dial cord dangling outside the set, which meant the 'phantom twiddler' had been inside it and done goodness knows what. I was happy at £20, and when we arrived home and I put it on the lamp dimmer, even happier to find that it worked on both bands, after a fashion.
On removing it from its case, the only evidence of anyone having got at it was that one non original cap, of the wrong value, had been fitted. There was some instabilty but I didn't bother doing any voltage checks as five waxies had to come out and the smoothing/reservoir caps would need reforming. I checked all the resistors, and surpisingly, all but two were in spec, by which I mean within =/- 20% of their original value. Four were 8% over, another four 16%, one was 33%, and a 5 Watt 15K was 18k - just on 20% over. As it was the resistor that set the HT voltage to the anodes, I decided to replace that with a 7 Watt one, though the anode Voltages were only 7 Volts below spec, but it has to work hard for a living, and would only get worse with time.
If a resistor are well out of spec, I calculate what needs to be put in parallel to bring it on spec, then temporarily attach a resistor to that value across the one that is high to see what difference it makes to voltage readings or performance. Often, it makes no difference, but sometimes it can make the difference of a non-oscillating frequency changer bursting into life, with higher voltages on the grid and anode.
Incidentally, don't always believe what you see on Trader Sheets! On the voltage chart for this FB110, one valve was allegedly supposed to have 70V on pin 7, when in fact the circuit and chassis showed that both pin 7 and pin 3 went to chassis. Also, one of the resistor values was listed as beig 470 Ohms, when in fact the correct value was a thousand times greater - 470k! The original factory fitted one was clear to see.
I reformed the electroytics and left them at their working voltage for a few hours each after the leakage became negligible - about 0.5mA. I restrung the dial drive, fitted a new bulb, cleaned the diffuser, switched on the set, and checked the voltages, all of which were close to spec.
I didn't like the way that one waxy from the smoothing cap, was just joined to a 4" length of wire and just hanging there. For me, safety always trumps orginality, so I added a stand-off insulator to which I anchored the wire from the smoothing cap, and the cap to which it was connected. The stand off can be seen between the wavechange switch and the volume control under the chassis. Another safey asect to which I attended was to remove the external aerial socket and the puny little 100 Volt Hunts cap which isolated the bottom end of the external antenna coupling coil from the chassis. If the chassis polarity was ever reversed, the chassis would be live, and I wasn't prpared to lerave such a puny cap in place. Neither was I keen on fitting an X Class cap in its place as an external antenna simply isn't necessarty in a set which has a ferrite rode antenna. The set is lively is use, and pulls in Dutch, Irish and French stations on LW.
I turned my attention to the case, and after removal of the dial and speaker cloth, which was rotten, I cleaned the case, primed it with an aerosol spray, but had difficulty finding a suitable green car aerosol colour of quite the right shade. I therefore tried to find a suitable colour of modelling spray for use in an airbrush that I have. Again, nothing quite suitable as they tend to be either very bright colours, or drab colours for military models. They're all matt and if a gloss finish is desired, you overspray them gloss. I tried what seemed to be a light green, but when it dried it looked garish, and quite unsuitable. Then I tried 'pastel green' which - though not perfect is as near as I could get to the desired colour. I could actually get and aerosol mixed to any desired colour while I wait at a local firm, but I'd already committed myself to the air brush approach. I found some green material which seemed to look of for the speaker grille inp lace of the original rotten and faded material.
I'd like to express my apprciation to Rob, ('Bushbaby') who very kindly supplied two of the caps I needed to finish off the restoration.
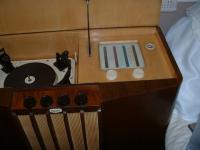
I've attached a few pics which might be of interest. I'll add a few more pics in another post another time.
David
On removing it from its case, the only evidence of anyone having got at it was that one non original cap, of the wrong value, had been fitted. There was some instabilty but I didn't bother doing any voltage checks as five waxies had to come out and the smoothing/reservoir caps would need reforming. I checked all the resistors, and surpisingly, all but two were in spec, by which I mean within =/- 20% of their original value. Four were 8% over, another four 16%, one was 33%, and a 5 Watt 15K was 18k - just on 20% over. As it was the resistor that set the HT voltage to the anodes, I decided to replace that with a 7 Watt one, though the anode Voltages were only 7 Volts below spec, but it has to work hard for a living, and would only get worse with time.
If a resistor are well out of spec, I calculate what needs to be put in parallel to bring it on spec, then temporarily attach a resistor to that value across the one that is high to see what difference it makes to voltage readings or performance. Often, it makes no difference, but sometimes it can make the difference of a non-oscillating frequency changer bursting into life, with higher voltages on the grid and anode.
Incidentally, don't always believe what you see on Trader Sheets! On the voltage chart for this FB110, one valve was allegedly supposed to have 70V on pin 7, when in fact the circuit and chassis showed that both pin 7 and pin 3 went to chassis. Also, one of the resistor values was listed as beig 470 Ohms, when in fact the correct value was a thousand times greater - 470k! The original factory fitted one was clear to see.
I reformed the electroytics and left them at their working voltage for a few hours each after the leakage became negligible - about 0.5mA. I restrung the dial drive, fitted a new bulb, cleaned the diffuser, switched on the set, and checked the voltages, all of which were close to spec.
I didn't like the way that one waxy from the smoothing cap, was just joined to a 4" length of wire and just hanging there. For me, safety always trumps orginality, so I added a stand-off insulator to which I anchored the wire from the smoothing cap, and the cap to which it was connected. The stand off can be seen between the wavechange switch and the volume control under the chassis. Another safey asect to which I attended was to remove the external aerial socket and the puny little 100 Volt Hunts cap which isolated the bottom end of the external antenna coupling coil from the chassis. If the chassis polarity was ever reversed, the chassis would be live, and I wasn't prpared to lerave such a puny cap in place. Neither was I keen on fitting an X Class cap in its place as an external antenna simply isn't necessarty in a set which has a ferrite rode antenna. The set is lively is use, and pulls in Dutch, Irish and French stations on LW.
I turned my attention to the case, and after removal of the dial and speaker cloth, which was rotten, I cleaned the case, primed it with an aerosol spray, but had difficulty finding a suitable green car aerosol colour of quite the right shade. I therefore tried to find a suitable colour of modelling spray for use in an airbrush that I have. Again, nothing quite suitable as they tend to be either very bright colours, or drab colours for military models. They're all matt and if a gloss finish is desired, you overspray them gloss. I tried what seemed to be a light green, but when it dried it looked garish, and quite unsuitable. Then I tried 'pastel green' which - though not perfect is as near as I could get to the desired colour. I could actually get and aerosol mixed to any desired colour while I wait at a local firm, but I'd already committed myself to the air brush approach. I found some green material which seemed to look of for the speaker grille inp lace of the original rotten and faded material.
I'd like to express my apprciation to Rob, ('Bushbaby') who very kindly supplied two of the caps I needed to finish off the restoration.
I've attached a few pics which might be of interest. I'll add a few more pics in another post another time.
David